Saturday, July 29, 2017

A Little Snail Mail

Hi crafty friends!
Today I am back to share a card that I created using some fabulous dies and stamps that can be found in the Dies R Us Store

I'm making it my mission to be better about sending more happy mail starting in August. In order to do that, I need to build up my stock a little. lol! 

I started by pulling out some dies that I thought would be perfect for the card I had in mind. They were the Lawn Fawn Stitched Hillside Borders and Lawn Fawn Happy Mail dies. I die cut all my pieces and started assembling. 


Here is a look at the completed card:


The mailbox was so super easy to put together! I decided to put a greeting along the edge of one of the hillside borders and heat emboss it in white. The greeting and the cute little snail came from the Lawn Fawn Gleeful Gardens stamp set. Once my card was finished, it still didn't look finished to me so I decided to add some fun Lawn Fawn Puffy Cloud Borders to the top of my card to complete my little scene that I created. Adorable!

Don't forget to come join in the fun at the Dies R Us Challenge BlogThere's a new challenge theme offered on the 1st and 15th of each month and one lucky randomly drawn winner will receive a gift voucher prize to the Dies R Us StoreFor your convenience, all the important Dies R Us links are provided below. 

click below for:


Thanks so much for stopping by today!
I hope you have a great crafty day!
Supply List:
--Cardstock: Recollections, Vellum, Guava (Lawn Fawn), Wild Cherry (MFT)
--Patterned Paper: Perfectly Plaid Rainbow (Lawn Fawn)
--Stamps: Gleeful Gardens (Lawn Fawn)
--Dies: Stitched Hillside Borders, Happy Mail, Puffy Cloud Borders (Lawn Fawn)
--Ink: Tuxedo Black Memento, Versamark
--Copics: C2, C4, R20, R43
--Misc.: White Embossing Powder, Foam Tape

Thursday, July 27, 2017

Sketches In Thyme Project Life Style Guest Designer

Hey crafty friends!
I hope you are all having a terrific Thursday!
I'm so happy to announce that today I am a guest designer for the
If you enjoy pocket style scrapbooking along with sketches and haven't heard of them before, you really should check them out. They offer 4 sketches every month, and since I love sketches and am forever behind in my albums that really helps me get some cards ready to go for a future layout. 

The sketch I was given to work with for my guest DT spot is this awesome sketch:


Here is my take on the sketch:


I adore how this turned out and can't wait to put it into my album! It was super simple to make too! I used an older pack of ready to go cards. Not sure which ones they were since I no longer have the packaging, but I wanna say they were a Snap Pack from Simple Stories. I took the minty colored journal card for my base and cut up two other cards to create the embellie to make the card my own. The embellishment is popped up with some foam tape for a little dimension, I love doing that! I added a little heart, some crochet thread and some Nuvo drops and this card was done! 

I have enjoyed playing along in these challenges for the last couple of months and this month was no exception! I just had to play and create something with the other three sketches also. haha! Here is a look at the other sketches for this month:

Sketch #77:

My take:


This card was done like the other card. I simply cut up cards from the set to create my own. The banners are only attached at the edge so that the 2x3 photo can easily be adhered.

Sketch #78:

My take:


I cut up some of the scraps to create the banners on this one. Tied some crochet thread around the top and added some more Nuvo drops onto the card.

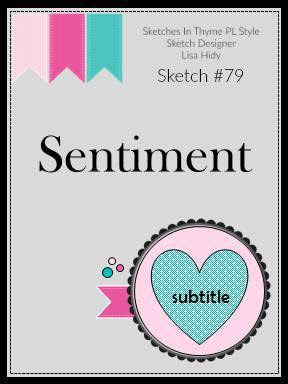
Sketch #79:

My take:


I used more scraps for this one and added the sweet little camera. The camera was actually on a 2x2 card that was in the set and I just fussy cut it out and popped it up with some foam tape. I added a sentiment from a My Creative Time stamp set and more Nuvo drops.


These were all so easy to make but I love how just by simply altering some pre made cards, they feel more like my own style and the sketches just made it so much easier! Gotta love that!!

Ok so last month when I played along, I posted where I was at in each of my PL albums. I thought it would be kinda neat if I kept myself accountable each month by posting my progress. Here are my stats that I posted last month per album (album year/month currently on):

2016: June
2017: halfway through March

Not much progress this month I'm afraid. Still no movement on my 2016 album and I am now only halfway through April in my 2017 album. There is progress though so I will happily take it, even if it isn't as fast as I would like haha!

A big Thank You to Lori and the Sketches In Thyme PL Style Challenge Blog for having me guest design! I had so much fun!!

Thanks so much for stopping by my blog and taking a look at my latest creation!
I really appreciate it!
I hope you have a great crafty day!!

Supply List:
Glossy White Nuvo Drops
Foam Tape
Clear Wink Of Stella
Memento Tuxedo Black Ink
Camera Shy Stamp Set from My Creative Time
Crochet Thread
Tim Holtz Tiny Attacher
Bunch Of Fun Circle Dies from My Creative Time
A Snap Pack from Simple Stories (I think)


Wednesday, July 26, 2017

Congrats!

*This post contains affiliate links, which means I will receive a small commission if you make a purchase using any of the links in this post (at NO additional cost to you). Thank you for your support!*

Hello crafty friends!!
I hope you are having a wonderful Wednesday!
 Today I am back with another project that showcases some of those awesome 


I wanted to make a really simple, yet pretty, Congrats card to have on hand.


This was so super simple to do! I cut out Congrats, 5 times using the Congrats die. Four times were in white and once from the pretty pink paper in the Shades of Spring paper pack. I adhered them, trying to keep them as even as I could, onto some white cardstock. Once I had them all adhered, I trimmed my cardstock making sure to trim off some of the words. I added a strip of black striped cardstock from the Spring Color Pop paper pad to the edge and some glitter tape and attached that panel onto my A2 cardbase. So super easy but I think it really makes an impact. 

You can see the Pink & Main Blog HERE,
 the Pink & Main Store HERE
and the Pink & Main Creations Gallery on Facebook HERE.

 Thanks so much for stopping by!
I appreciate it so much!
I hope you have a great crafty day!

Supply List:
--Cardstock: White (Georgia Pacific)
--Patterned Paper: Shades of Spring & Spring Color Pop (Pink & Main)
--Dies: Congrats (Pink & Main)
--Misc.: Silver Glitter Tape
Tuesday, July 25, 2017

A Cute Little Hey!

Hey crafty friends!
How is your day going so far? I hope great!
Today I have a sweet little card to share with you that I made to play along with the sketch challenge over at Your Next Stamp.

Here is a look at sketch #69:


and here is the card I created based on the sketch:


Isn't that little lizard the cutest?? I just think he is adorable! I colored him with my copics and matted him onto some fun plaid paper. I added my other papers onto my card base and popped him up with foam tape, stamped my greeting and also added that with foam tape. Such a cute card to send to someone to just say Hey and not a lot of bulk so it will be easy to mail. :) 

Thanks so much for stopping by my blog today and taking a look at my latest creation!
I really appreciate it!
I hope you have a great crafty day!
Supply List:
--Cardstock: Kraft (Recollections), White (Copic)
--Patterned Paper: Family Ties (Pebbles)
--Stamp: Happy Dance (Your Next Stamp)
--Ink: Tuxedo Black Memento
--Copics: C2, C4, G24, G43, G94
--Misc.: Foam Tape, Black Micron Tape


Monday, July 24, 2017

FCCB #306 Anything Goes

 Happy Monday and welcome to another Monday challenge!


Challenge #306-Anything Goes!
Create a project that features anything in the Cricut Library!

This Weeks Sponsor


The prize is 4 digital stamps!


To qualify for the prize, be sure to use at least 1 Cricut cut on your project and if it's not obvious, let us know what cartridge you used. If you use a Cricut Explore machine, at least one cut must be from the Cricut catalog of images.

Here is my project-


Maybe it is the oh so hot temps we have been having lately in my area but I decided to make a beach themed card for this anything goes challenge. I used my Life Is A Beach Cricut cartridge to cut out my fun little Hula Girl, waves and Aloha. I used a Peachy Keen stamp for her sweet little face. I added some clear wink of stella to the sand, her skirt and the Aloha and that's about it. Super easy peasy but I really like how it turned out!

This is my last post for the Fantabulous Cricut Challenge Blog as my term has come to an end. I've had a blast and all the ladies on the team are so super nice! It was an honor to get to know and work alongside you all!! Thanks for having me!!
Be sure to stop by the Fantabulous Cricut Challenge Blog to see the projects that my design team sisters created! I hope you will power up that Cricut and make a project for the challenge! I would love to see what you create!

Thanks so much for stopping by and taking a look at my latest creation!
I really appreciate it!

I hope you have a great crafty day!!
Supply List:
--Cardstock: Hisbiscus Burst (PTI), Bermuda Bay & Daffodil Delight (SU!), All Others from my scrap pile
--Patterned Paper: Beach Babe (Pink & Main)
--Ink: Broken China Distress
--Stamp: Princess Face Asst. (Peachy Keen Stamps)
--Cricut: Life Is A Beach cartridge
--Misc.: White Gel Pen, Bling, Divine Swirls Embossing Folder, Chalk


Sunday, July 23, 2017

Donut Worry!

Hey guys!
I hope you had an amazing weekend and are enjoying your Sunday!
Today I have a really simple card to share with you that I made for a couple of challenges.
The challenges are:

and

Here is the card I created for the challenges:


Like I said, really simple lol! This was so easy! I made my A2 card base from some white cardstock and layered it with some papers from the Cream & Sugar 6x6 paper pad from Doodlebug. I followed the above sketch for the rest of the layers. The cute little donut was from the cut apart sheet in the paper pad, as was the sentiment. I popped up the greeting and donut with foam tape and added some Glossy White Nuvo Drops. Easy peasy but oh so adorable!! 

Thanks so much for stopping by my blog today and taking a look at my latest creation!
I really appreciate it!

I hope you have a great craft day!!
Supply List:
--Cardstock: White (Georgia Pacific)
--Patterned Paper: Cream & Sugar (Doodlebug)
--Misc.: Foam Tape, Glossy White Nuvo Drops

Saturday, July 22, 2017

Love ya Shaker Card

Hi crafty friends!
I hope you are having a fabulous Saturday!
Today I am back to share a card that I created using some fabulous stamps and dies that can be found in thDies R Us Store

I decided to go with a shaker for this card and the Neat & Tangled Heart of Gold die was just what I was looking for.


This was really simple to do. I simply used the die to cut out the heart shape from the center of my main cardstock panel.  I placed some acetate on the back of my card and surrounded the back with foam tape to hold all my shaker bits in. I placed a scrap piece of white cardstock onto the back to lock in the shaker pieces and to make it easier to place it onto my black card base. I used the Neat & Tangled Heart of Gold die once again and cut out a piece from some black cardstock to place on top of the window. I wanted the front of my shaker piece to have that fun geometric look to it. For my greeting, I used some white embossing powder and heat embossed this fun saying from the Lawn Fawn Big Scripty Words stamp set. I added some doodles around the edge of the card front and attached some sequins for a bit more interest. 


Here is a quick peek (with links) to the products that I used on my card today that can be found in the Dies R Us store:


Don't forget to come join in the fun at the Dies R Us Challenge BlogThere's a new challenge theme offered on the 1st and 15th of each month and one lucky randomly drawn winner will receive a gift voucher prize to the Dies R Us StoreFor your convenience, all the important Dies R Us links are provided below


click below for:


Thanks so much for stopping by today!
I hope you have a great crafty day!

Supply List:
--Cardstock: Recollections and Acetate
--Patterned Paper: Studio Gold (Teresa Collins)
--Dies: Heart Of Gold (Neat & Tangled)
--Stamp: Big Scripty Words (Lawn Fawn)
--Ink: Versamark
--Misc.: Sequins, White Embossing Powder, Foam Tape, Black Micron Pen


Friday, July 21, 2017

Happy Birthday Cupcake!

Hey crafty friends!
I hope you are having a fabulous Friday!
Today I have a super quick post to share with you a card that I made for a couple of challenges.
They are:
&

Here is the card I created based on the sketch and birthday theme:


I used the Cupcake Day Stamp set from MFT and colored some of it with copic markers. I decided to paper piece the balloon and her clothes.This card came together really quick and I'm super happy with the end result. 

Thanks so much for stopping by today and taking a look at my latest creation!
I hope you have a great crafty day!!

Supply List:
--Cardstock: Guava & Mermaid (Lawn Fawn), White (Georgia Pacific and Copic)
--Patterned Paper: Perfectly Plaid (Lawn Fawn)
--Stamp: Cupcake Day (MFT)
--Dies: Blueprints 27, Cupcake Day & Scallop Basic Edges (MFT)
--Ink: Memento Tuxedo Black
--Copics: C6, C8, E21, E23, E27, E50, E51, RV10
Misc.: Sequins, Foam Tape, Glossy Accents

Thursday, July 20, 2017

Sketch N Scrap July's 2nd Card Sketch

Hey crafty friends!!
It's Thursday and that means it's almost the weekend!!! Woot Woot!!
Today starts a new card sketch challenge over at 

Here is a look at the second card sketch for July courtesy of Lisa:


and here is my take on the above sketch:


When I first looked at the sketch, butterflies immediately came to mind. I have no idea why but I went with it lol! I decided I wanted to have a soft color pallete to go along with the butterflies. When I came across the paper in the Cedar Lane paper pad from Pink Paislee, I knew they were perfect for what I had in mind for my card. I used some dies from My Creative Time for the stitched card mats and layered them onto my white card base and added a fun little scallop border. I die cut my butterflies using two different pink papers in the stack and added them onto my card. I cut a strip of vellum and added my hello. I cut my hello again from some fun foam and adhered it the the back so that I could pop up my vellum without any adhesive peeking through. I finished off my card with some glossy white Nuvo drops scattered here and there. I love how it turned out! 

Thanks so much for taking the time to stop by and take a look at my latest creation!
I appreciate it so much!
Don't forget to swing by the Sketch N Scrap blog and take a look at what my talented DT sisters made with the sketch. I hope you decide to play along, I would love to see what you create!
Have a great crafty day!!

Supply List:
--Cardstock: Vellum, White (Recollections)
--Patterned paper: Cedar lane (Pink Paislee)
--Dies: Pretty Butterflies & Dragonflies & Stitched Rectangular Frame Dies (My Creative Time), Hello (Impression Obsession), Scallop Borders (Pink & Main)
--Misc.: Foam Tape, Fun Foam, Glossy White Nuvo Drops


Wednesday, July 19, 2017

What's the Scoop

*This post contains affiliate links, which means I will receive a small commission if you make a purchase using any of the links in this post (at NO additional cost to you). Thank you for your support!*

Hello crafty friends!!
I hope you are having a wonderful Wednesday!
 Today I am back with another project that showcases some of those awesome 


I thought it would be fun to make a little gift/treat bag using the The Scoop stamp set.


I cut my bag out using my Cricut and assembled it and put it aside for a bit. I created a tag by cutting a piece of fun dotted cardstock from the Beach Babe paper pad and notching the end. I took another piece of cardstock and used one of the circles from the Stitched Circle dies to cut it out. I added it to my banner piece with foam tape. I stamped out that sweet little girl from the The Scoop stamp set, colored her in with my Copics and used the coordinating Scoop dies to cut her out. I glued her to the circle and added the greeting along the bottom. I cut out two holes in the top of my tag and attached it to my bag with some crochet thread. I finished it off with a few sequins scattered about. 

You can see the Pink & Main Blog HERE,
 the Pink & Main Store HERE
and the Pink & Main Creations Gallery on Facebook HERE.

 Thanks so much for stopping by!
I appreciate it so much!
I hope you have a great crafty day!

Supply List:
--Cardstock: Pink Lemonade (MFT), White (Copic)
--Patterned Paper: Beach Babe (Pink & Main)
--Dies: The Scoop & Stitched Circle Dies (Pink & Main)
--Cricut: Once Upon A Princess
--Ink: Memento Tuxedo Black
--Copics: E21, E23, E25, E27, E31, E50, E51, R29, RV10, Y08
--Misc.: Pretty Pink Posh Sequins, Crochet Thread, Foam Tape, Chalk

PDE Challenges #182 Guest Designer

Hi crafty friends!
I hope you are all having a wonderful Wednesday!!
I am very happy to share that this week I am a guest designer for 


This week the challenge is....
Down On The Farm.

I decided to make a fun little box to hold some candy for the challenge.


I purchased this cute little chicken coop box from SVGCuttingFiles and put it all together, being sure to ink the edges of all my kraft colored cardstock. I decided my coop needed a chick so I used one of the cute little chicken stamps from the June 2017 Peachy Keen Stamps stamp club set. I added adhesive to one half of her and adhered her to the coop. I also used one of the sentiments in the stamp set to place over the doorway. I filled the inside with some paper shred and some mini peanut butter cups (candy was hubby's choice lol). I think it turned out so super cute!

Be sure to stop by the PDE Challenges blog to see all the fabulous creations the DT made! 
I hope you will be inspired to join in and play along :)

Thanks so much for stopping by my blog today and taking a look at my latest creation!
I really appreciate it!

I hope you have a great crafty day!
Supply List
--Cardstock: Fireball (bazzill), All Others (Recollections)
--SVG: Chicken Coop (SVGCutting Files.com)
--Stamps: PKSC 35 June 2017 (Peachy Keen Stamps)
--Inks: Vintage Photo Distress, Tuxedo Black Memento
--Copics: C0, C1, R24, R29, YR04
--Misc.: Foam Tape, Chalk, White Gel Pen

Saturday, July 15, 2017

Sketch N Scrap Layout #133

Hey crafty friends!!
I hope you are having a super Saturday!
Today I am back with another sketch reveal from Sketch N Scrap.
Just in case you don't already know, Sketch N Scrap is a sketch challenge blog that offers Layout and Card sketches each month! Layout sketches are posted on the 1st and 15th of each month and card sketches are posted on the 5th and 20th of each month. Here is a look at the latest layout sketch provided to us by Heather, Layout Sketch #133.


Fun right? Here is my take on the above sketch:


Recently my hubby and I celebrated our 26th wedding anniversary. Whoa!! The actual anniversary was during the week and he was working so we decided to celebrate it on one of his weekends off by keeping it low key and doing the movies and lunch. This picture was taken on that day out. There were a lot of colors going on in the picture so I printed it out in black in white for the layout. I used some papers from Crate Paper. Not sure which collection it is, it was a Hot Buy at Michael's a couple of years ago. I cut out that scalloped piece of cardstock with my Cricut as well as the hearts and title. I added a doodled border and some sequins/pearls to finish it off. The papers all have a vintage feel to them with some random spots and smudges so I kept that going with inking up the edges on my cut outs. I think it turned out so pretty and am so happy with it!! It's currently in my display stand in the living room so I can see it everyday ♡

Thanks so much for taking the time to stop by and take a look at my latest creation!
I appreciate it so much!
Don't forget to swing by the Sketch N Scrap blog and take a look at what my talented DT sisters made with the sketch. I hope you decide to play along, I would love to see what you create!
Have a great crafty day!!
Supply List:
--Patterned paper: Crate Paper
--Cricut; You & Me (Don Juan), Scalloped Background (Edge to Edge), Hearts from the Shapes 
--Inks: Vintage Photo Distress
--Misc.: Date Roller Stamp (Heidi Swapp), Sequins, Pearls, Black Micron Pen, Foam Tape, Tim Holtz Tiny Attacher.

Related Posts Plugin for WordPress, Blogger...