Sunday, February 26, 2017

Christmas Card Challenges #7


Hello crafty friends! I hope you are having a wonderful Sunday :)
 Today marks the beginning of another challenge at Christmas Card Challenges!! 

 The challenge is:

Such pretty colors! I was inspired by the gray and the mauve-ish colors and decided to make a little scene with a snowglobe set that I received as a gift this past Christmas.


I stamped out my snowglobe with some versamark ink and used some silver embossing powder. After I had it heat embossed, I used to coordinating die to cut it out and again for the card base. I used some stitched hills to create my snowbanks and a tree die for my trees. Before I built my scene though, I used some glossy texture paste and a snow fall stencil to create some texture in my globe. I added some glitter to my trees and started building my scene once the paste was dry. I stamped out my snowman and fussy cut him out and popped him up with some foam adhesive. I placed some iridescent sequins on my card to finish it off.

Be sure to head over to the Christmas Card Challenges blog to see the amazing cards my design team sisters created. I hope you are inspired and decide to join us and play along with the challenge.
 I would love to see what you create :)
 Thank you so much for taking the time to stop by and take a look at my latest creation!
 I really appreciate it :)
 I hope you have a great crafty day!

 photo signaturecopy_zpsa1897fa6.png
Supply List:
--Cardstock: Georgia Pacific
--Stamps: You're So Cool & Warm Holiday Fun (My Creative Time), Snowglobe (Prima), Happy Lashes (Peachy Keen Stamps)
--Dies: Snowglobe (Prima), Seasonal Greetings (MCT), Stitched Hillside Borders (Lawn Fawn)
--Ink: Studio G, VersaMark
--Misc.: Snowfall Stencil (MFT), Glossy Paste (Recollections), Dazzling Diamonds Glitter (SU!), Sequins, Silver Embossing Powder 

You're Super!

Hey crafty friends!
I hope you are having a Super Sunday so far :) 
I was able to create a card last night for the current

Here is a look at the sketch:

and a look at the card I created based on the sketch:


I bought this stamp set quite a few months ago and thought it would be the perfect time to break it out and get it inky. I colored my super with my Copics and then used the coordinating dies to cut her out. I added some wink of stella to her cape and boots for a bit of sparkle. I set her aside and stamped my city backdrop and used a yellow Copic to add some "lights". I layered all my papers and popped up my greeting and girl with some foam tape for just a bit of dimension. I finished off my card with some faux white stitching. I probably should have flipped the red and navy blue cardstock but too late now lol! I still like it :) 

I will also be entering my card into the following challenges:
&

Thanks so much for stopping by my blog and taking a look at my latest creation!
I really appreciate it!!
I hope you have a great crafty day!!

 photo signaturecopy_zpsa1897fa6.png
Supply List:
--Cardstock: Wild Cherry & Nightshift Blue (MFT), White (Copic)
--Patterned Paper: Basics (Pebbles)
--Stamp: You're Super (MFT)
--Dies: You're Super (MFT), Nesting Circles (WRMK)
--Ink: Tuxedo Black Memento
--Copics: B16, B18, E15, E21, E50, E51, E99, R27, R29, R89, Y000, Y02, Y04, Y08, Y26, YR24
--Misc.: White Gel Pen, Wink of Stella, Foam Tape
Saturday, February 25, 2017

Make a wish!

Hey crafty friends!
I hope you are having a great Saturday!
I was able to get a little crafting done this morning and was able to make a card for the following challenges:


2. Seize The Birthday (no topping)
and

Here is a look at the card I created:


I cut out that cute little cake from the Smiley Cards Cricut Cartridge and added it to a die cut circle. I stamped my greeting and colored in the "wish" to match the candles and to help tie in some of the yellow. I think it is super simple but super cute!! I love those fun little cricut cuts :) 

Thanks so much for taking the time to stop by my blog and take a look at my latest creation!
I really appreciate it!
I hope you have a great crafty day!

 photo signaturecopy_zpsa1897fa6.png
Supply List:
Cardstock; Recollections
Patterned Paper: American Crafts
Stamp: Let's Party (Technique Tuesday)
Cricut: Smiley Cards
Copics: Y04, Y08
Misc.: Foam Tape, Wink Of Stella, Tuxedo Black Memento Ink

Thursday, February 23, 2017

If You Give A Crafter A Cookie #63

Hey crafty friends!
I hope you are having a terrific Thursday!!
Today starts a new challenge over at the

We have two sponsors for challenge #63 and they are:

and

Here is a peek at the cookie inspiration photo for this challenge:

Cute right?


Here is the card that I created based on the above cookie photo:


When I saw the cookies, my first thought went to birthday. Probably because of the balloons lol! Luckily, I had this image already colored up from awhile back. I ended up going a different direction back then so I decided to use this cutie for this card. I did stamp him again onto some mask paper so that I could create the sky and ground. I used a cloud stencil and softly blended some Tumbled Glass distress ink to create the clouds and then used some Mowed Lawn Distress Ink to create the ground. I removed my mask and added some shadows onto my grass as well as some sprigs of grass and some fun little white accents on the clouds. I used a stitched die to cut him out and popped him up onto a fun scallop rectangle border that I wrapped some twine around. I love that the cookies even have a scallop border :) I adhered everything with more foam tape onto a yellow card base. 

Be sure to stop by the 
to see all the fabulous creations my Design Team sisters created.
If you are inspired by the cookie photo, I hope you will create a project and link up :) 
I would love to see what you create!

Thanks so much for stopping by today!
I really appreciate it!
❤ I hope you have a great crafty day! ❤

 photo signaturecopy_zpsa1897fa6.png
Supply List:
--Cardstock: White (Georgia Pacific & Copic), Daffodil Delight (SU!)
--Stamp: Bunch Of Balloons (WIld Rose Studio)
--Inks: Tuxedo Black Memento, Tumbled Glass & Mowed Lawn Distress Ink
--Dies: Stitched Rectangular Frame Dies & More (MCT), Blueprints 27 (MFT)
--Misc.: White Gel Pen, Foam Tape, Lemon Tart Trendy Twine, Copics, Cloud Stencil, Gray Marker
Wednesday, February 22, 2017

Hello

Hey crafty friends!
How is your Wednesday going so far? 
I hope good :) Today I am back with another project that showcases some of those awesome 
Pink & Main stamps and dies.

BlogButton

I like sending cards to my crafty friends so I needed to add to my Hello cards stockpile. I pulled out the Scentsational stamp set and created this:


I created a square card base that measures 4.25" and added some polka dot paper to the top and black cardstock to the bottom. I colored that cute little skunk from the Scentsational set and cut it out with the coordinating dies. I added some grossgrain ribbon, tied a bow and popped my skunk up with foam tape and added some glossy accents to the bow in her hair and to the ladybugs. For the finishing touch, I added some doodles with my white gel pen to the bottom and used the Hello Die for my greeting.

You can see the Pink & Main Blog HERE ,
the Pink & Main Store HERE
and the Pink & Main Creations Gallery on Facebook HERE

Thanks so much for stopping by!
I appreciate it so much!
❤ I hope you have a great crafty day! ❤

 photo signaturecopy_zpsa1897fa6.png
Supply List:
--Cardstock: White (Copic & Georgia Pacific)
--Patterned Paper: Color Vibe 1 (Simple Stories)
--Stamp: Scentsational (Pink & Main)
--Dies: Scentsational, Hello (Pink & Main)
--Ink: Tuxedo Black Memento
--Copics: C0, C2, C4, C6, R27, RV52
--Misc.: Ribbon, Glossy Accents, White Gel Pen, Corner Rounder
Tuesday, February 21, 2017

I love you in the morning....

Hi crafty friends!
I hope you are all having a terrific Tuesday so far!
Today I have a card to share with you that I made for the current sketch challenge over at

Here is a look at their sketch:

and here is the card that I created based on the above sketch:


I found this sweet little sentiment stamp in the dollar bin at Michael's quite a few months ago. I thought it was the perfect size for this sketch. After I had it stamped out, I used a die from MFT to cut it out. I layered my card with some papers from the Everyday 6x6  paper pad and then popped up my greeting panel with some foam tape. I added a few hearts and applied some wink of stella to them and glossy accents. To finish off the card, I rounded the bottom two corners. 

I will also be entering my card into the following challenge:

Thanks so much for taking the time to stop by my blog and taking a look at my latest creation!
I really appreciate it!!
I hope you have a great crafty day!

 photo signaturecopy_zpsa1897fa6.png
Supply List:
--Cardstock: White (Georgia Pacific)
--Patterned Paper: Everyday (AC)
--Stamp: Studio G
--Dies: Project Life Set (for the bigger heart), Zig Zag Stitched Rectangles (MFT)
--Misc.: Wink Of Stella, Glossy accents, Foam Tape, Corner Rounder, Owl Builder Punch (SU!)
Monday, February 20, 2017

Stick It Down Card Sketch Challenge

Hi crafty friends!
I hope your Monday is off to a marvelous start! 

Today I am here to share a card sketch with you from the 
Stick It Down is a monthly sketch challenge blog.  They provide sketches not only for a card once a month, but also for double and single page layouts! Cool right??
The sketches are normally posted on the first of the month with reveals of the design team's interpretations throughout the month . Today the card team designers are showing what they created for this month's card sketch.

Here is another look at the card sketch for February 2017:

and here is the card that I created based on the above sketch:


I cut out a piece of Kraft cardstock using a stitched rectangular die and placed it on top of my coral card base. I die cut a coffee mug from some doodlebug patterned paper, added a white heart and popped it up on my card with some foam tape. I stamped my greeting using some brown ink onto a strip of white cardstock, notched the ends and also placed that onto the card with some foam tape. I finished off my card with some faux stitching with my white gel pen. Super duper simple but I love that it gets straight to the point hehehe!

I hope you will stop by the Stick It Down Challenge blog and take a peek at what my design team sisters created with the sketch. I hope you are inspired to join us! I would love for you to link up so I could take a peek at what you created :) 

Thanks so much for stopping by my blog and taking a look at my latest creation!
I really do appreciate it!

I hope you have a great crafty day!

 photo signaturecopy_zpsa1897fa6.png
Supply List:
--Cardstock: Recollections
--Patterned Paper: Cream & Sugar (Doodlebug)
--Stamp: Kiss Me A Latte (Jaded Blossom)
--Dies: Stitched Rectangular Frame Dies & More (MCT), Project Life Die Set for the Heart, Coffee Dies (Jaded Blossom)
--Ink: Baked Brown Sugar (SU!)
--Misc.: White Gel Pen, Clear Wink Of Stella, Glossy Accents, Foam Tape
Friday, February 17, 2017

Ombre Hello

Hi crafty friends!
Happy Friday!! Any fun plans for the weekend? It's supposed to be almost 70 in my area so hopefully I can find something to do outdoors and enjoy a little warm weather :) 

Today I have a card to share with you that I made for a couple of challenges.

and 

 Here is a look at the card that I created based on the above sketch:


When I saw the sketch, the first thing that came to my mind were some words going down in a straight line. Originally I was thinking rainbow but I still had some of these pink hearts on my desk left over from Valentine's so the idea of ombre was born lol! I got out some pink cardstock in different shades and die cut the word "hello" using the Hello There Die-namics. I tried my best to adhere them as straight as I could going down the card front lol. I added a stitched line from a another die and finished off my card with a few of the puffy heart stickers. Easy peasy!

Thanks so much for taking the time to stop by my blog today and taking a look at my latest creation! I really appreciate it!!
I hope you have a great crafty day and a lovely weekend!

 photo signaturecopy_zpsa1897fa6.png
Supply List:
--Cardstock: White (Strathmore Bristol Smooth). Pinks (Recollections)
--Dies: Hello There (MFT), Stitched Line Die (Your Next Stamp)
--Misc.: Puffy Heart Stickers (Target Dollar Spot)

Thursday, February 16, 2017

DCWV Feb. Stack-a-Holic Challenge

Happy Thursday crafty friends!
Today I have a card to share with you that I made for the 

Here is a look at the card sketch for February:


Here is a look at the card that I created based on the above sketch:


I adore the Meet Me In Paris stack from DCWV. I used it for all the patterned papers on my card. The gold foil accents in this paper are so very pretty! I inked all my edges with some Vintage Photo Distress ink and then layered everything together. The greeting came from the DIY Project Stack Favor Boxes, also from DCWV. I popped up the greeting and banner it is sitting on with some foam tape for a little dimension. I die cut some flowers and added a little bling to the centers. The black "enamel dots" are actually circles cut from the back side of the pink polka dot paper with some wink of stella and glossy accents added to them. I love this card and am so happy with how it turned out! 

Thanks so much for stopping by my blog and taking a look at my latest creation! 
I really appreciate it!

I hope you have a great crafty day!
 photo signaturecopy_zpsa1897fa6.png
Supply List:
--Cardstock: White (Georgia Pacific)
--Patterned Paper: Meet Me In Paris (DCWV)
--Greeting: DIY Project Stack Favor Boxes (DCWV)
--Dies: Stitched Rectangular Frame Dies, Flower Petal Dies, Stitched Pretty Flowers & Leaves Dies (MCT)
--Misc.: Foam Tape, Bling, Glossy Accents, Wink Of Stella, Doily
Wednesday, February 15, 2017

You're Scent-sational

Hey there crafty friends!!
I hope you are having a wonderful Wednesday so far!
Today I have a fun little project to share with you that I made using some of those new stamps and dies from Pink & Main!

BlogButton

I found a tutorial online that showed this sweet little treat box card and I knew I just had to try and make one!


After I made my box, I stamped out my little skunk and colored her in with my Copics. I used the coordinating dies to cut her out and placed her on top of a stitched circle from the Stitched Circle Dies with a little bit of foam tape. I love these little skunks in the brand new Scentsational set! I added a little "lace" trim by die cutting a border from the new Lacy Border Dies from some white cardstock and adding that to the outside of the pocket.


To create my tag, I used the Stitched Rounded Rectangle dies and added a bit of the patterned paper at the bottom, used a hole punch at the top and threaded some ribbon through. The polka dot cardstock is from the Spring Color Pop paper pad. I filled the treat box with some chocolate kisses. The box is being held shut with more ribbon. I added a few sequins to finish off my project.

You can see the Pink & Main Blog HERE ,
the Pink & Main Store HERE
and the Pink & Main Creations Gallery on Facebook HERE

Thanks so much for stopping by!
I appreciate it so much!
❤ I hope you have a great crafty day! ❤
 photo signaturecopy_zpsa1897fa6.png
Supply List:
--Cardstock: Pink (Bazzill), White (Copic), Vellum
--Patterned Paper: Spring Color Pop (Pink & Main)
--Stamp: Scentsational (Pink & Main)
--Ink: Tuxedo Black Memento
--Copics: C0, C1, C2, C4, C6, RV04, RV10, Y11, Y15, YG25
--Misc.: Wink Of Stella, Sequins, Glossy Accents, Ribbon
Tuesday, February 14, 2017

Shopping Our Stash #290

Hey everyone and happy Valentine's Day!!
It's time for a new challenge over at 

This week challenge #290 is....
Heartless
(Romantic project without using any hearts)

Here is what I created:


I have had this stamp in my stash for about 5 years now and it's been about that long since I used it last. As soon as I saw what the challenge was my mind immediately went to this stamp. I stamped it out onto white and onto a bunch of different patterned papers so that I could paper piece it so that their clothes and umbrella could have some fun patterns :) I used some stitched ovals to cut it out and popped it up onto another oval. I finished off my card with a fun scalloped edge and some pretty sheer ribbon. 

Neglected items from my stash:
--Patterned Paper; I used all scraps
--Stamp: Haven't used it in five years

Be sure to stop by the Shopping Our Stash challenge blog to see the amazing creations my design team sisters created. I hope you will decide to play along with us, I would love to see what you create.

I've decided to step down from the Shopping Our Stash team and sadly this is my last challenge. Thank you so much to all the ladies on the team! It has been an absolute honor to get to know and work alongside every single one of you each week!! Big crafty hugs!!

Thanks so much for stopping by my blog and taking a look at my latest creation!
I really appreciate it!
❤ I hope you have a great crafty day! ❤

 photo signaturecopy_zpsa1897fa6.png
Supply List:
--cardstock: Kraft (Recollections)
--Patterned Paper: This & That (Echo Park)
--Stamp: Rain Or Shine (Untiy Stamp Co.)
--Dies: Stitched Scallop Basic Edges (MFT), Scallop Stitched Oval Dies (MCT)
--Ink: Memento Tuxedo Black
--Misc.: Foam Tape, Ribbon
Sunday, February 12, 2017

Christmas Card Challenges #6

Hello crafty friends!
I hope you are having a wonderful Sunday :) 

Today marks the beginning of another challenge at 

The challenge is:

Isn't that a pretty scene? The horses look so festive!
I was struggling with what to make for this challenge. I kept trying to get an idea and it just seemed like I had lost my mojo. Well, the other day I was looking through some Cricut Cartridges and found this pretty horse frame and BAM! Idea born lol!


I cut out my frame shadow in red cardstock and then the horse layer with some gold glitter cardstock. I added some striped paper to the front of my square card base, adhered some ribbon and then placed my horse to the front of my card. I added my greeting, some pearls and a little holly for the horse's neck. The finishing touch was a pretty bow. So super simple to make but I have to say, I adore how it turned out! It is so sparkly and pretty! Gotta love that!!

Be sure to head over to the Christmas Card Challenges blog to see the amazing cards my design team sisters created. I hope you are inspired and decide to join us and play along with the challenge. I would love to see what you create :) 

Thank you so much for taking the time to stop by and take a look at my latest creation!
I really appreciate it :)

I hope you have a great crafty day!

 photo signaturecopy_zpsa1897fa6.png
Supply List:
--Cardstock: Wild Cherry (MFT), Gold Glitzy (DCWV), White (Georgia Pacific)
--Patterned Paper: Welcome Christmas (Pebbles)
--Stamp: Christmas Greeting Words (Peachy Keen Stamps)
--Ink: Tuxedo Black Memento
--Cricut: Horse from Winter Woodland Cartridge
--Misc.: Pearls, Ribbon, Foam Tape
Saturday, February 11, 2017

Hi There!

Hey guys! 
I normally try to not post twice in one day but I was able to get a card done just in time for the sketch challenge over at Tuesday Morning Sketches #389 so I figured I better link it up before I forgot lol!

Here is a look at their sketch:

and here is the card I created based on the above sketch:


I bought this stamp a few months ago and this sketch was the perfect time to get it ink-y! I colored her in with my Copic markers and used a cross-stitch die to cut her out. I matted it onto some Kraft cardstock, stamped my greeting in the top corner and wrapped some Strawberry Cupcake Trendy Twine around the bottom. I popped it up with some foam tape onto some pretty floral cardstock and attached it all to a Kraft card base. I finished it off with a few enamel dots. I think it came out super cute and it looks so much better in person. I was losing sunlight at the time I took the picture :( 

Thanks so much for taking the time to stop by and taking a look at my latest creation!
I really appreciate it!
I hope you have a great crafty day!

 photo signaturecopy_zpsa1897fa6.png
Supply List:
--Cardstock; Kraft (Recollections), White (Copic)
--Patterned Paper: Easter Express (Doodlebug)
--Stamp: Swinging By To Say Hi (CandiBean), Hi There (Jillibean Soup)
--Ink: Tuxedo Black Memento
--Dies: Cross-Stitch Rectangle Stax (MFT)
--Copics: C0, C2, C3, C6, E21, E31, E35, E37, E50, E51, E53, E57, E59, RV10, RV13, RV21, Y02, Y06, Y08, YG25
--Misc.: Enamel Dots, Strawberry Cupcake Trendy Twine, Foam Tape, White Gel Pen, 

Rocket Ship Valentine

Hey crafty friends!
I hope you are all having a splendid Saturday :) 

Today I have a fun little valentine to show you. Every year, I make my hubby and kids 14 valentine's. They wake up each morning with a different surprise starting on Feb. 1 and ending on Feb. 14. They look forward to it each year, I mean who wouldn't right? Here is a look at what they woke up to today:


I paired up the sentiment from the Candy Gram stamp set from Jaded Blossom with the Rocket Shuttle Bag from SVGCutting files and Voila! So incredibly easy and it came together rather quickly. Quick is important since I'm making three of each lol! I was able to fit 5 of these fun size Milky Way candy bars into the bag (I sized it down a little). My greeting is wrapped around a bamboo skewer that I cut and colored with a Copic Marker and then placed in between the candy bars. The flames are vellum that I colored with an orange Copic marker and then used some clear Wink of Stella to give it some shimmer. The little hearts are puffy stickers that I found in the Target Dollar Spot. 

I'm entering this into the Jaded Blossom Valentine Challenge

Thanks so much for taking the time to stop by my blog and take a look at my latest creation!
I really appreciate it!
I hope you have a great crafty day!

 photo signaturecopy_zpsa1897fa6.png
Supply List:
--Cardstock: Black (Bazzill), White (Georgia Pacific), All Others (Recollections)
--Stamp: Candy Gram (Jaded Blossom)
--Ink: Versafine Onyx Black
--SVG: Rocket Shuttle Bag (SVGCuttingfiles)
--Misc.:White Gel Pen, Clear WInk Of Stella, YR68 Copic, Puffy Heart Stickers
Friday, February 10, 2017

Pink & Main February Release Blog Hop


We are celebrating Pink & Main's February Release with a fun and inspirational blog hop!
Be sure to go to www.pinkandmain.com and check out all the new stamps and dies!
And be sure not to miss the brand new paper line that we are very excited to debut...we have 3 new 6x6 paper pads that are perfect for Spring and coordinate with each other.
Please hop along through all of the design team members' blogs, and a couple of guest designers' too!
There will even be some great prizes along the way! Woot woot!!

For my project, I created a fun little file folder notebook:


I found this fun tutorial for a File Folder Notebook on Splitcoast Stampers and knew I wanted to give it a go for my hop project. I had this fun pastel color file folder in my stash and thought it looked spring-y, so that's what I went with. I followed the tutorial as far as folding and making the actual notebook. To decorate it, I cut out a scallop circle from the Scallop Circle Dies in white and a yellow circle using the Stitched Circle Dies. I layered them on top of each other and then colored up that cute watering can from the Seeds Of Kindness stamp set with my Copics. I used the coordinating Seeds Of Kindness dies to cut it out and then I popped it up with some foam tape. I added a strip of ribbon to the side of my folder, tied a bow and tucked my sentiment from the Seeds of Kindness set under the bow. I gave it a little curl for some added dimension. 

The folder is held shut with some velcro. This is what you see when you open it:


There is a mini legal pad on the right hand side. I added some coordinating cardstock to the top of the pad and then added that fun yellow border to the top by using one of the borders from the Lacy Border Dies. I also stamped some hearts in different spots for the first few pages of the memo pad. I stamped another sentiment from the Seeds of Kindness stamp set and popped that up with some foam tape on the left hand side of the folder. 

I could not resist making a cute little clip with one of those sweet bunnies in the Seeds of Kindness set! Look how cute she is:


Adorable!

Each blog has a prize to give away and I am very excited to give away the stamp set I used on my project which is:


To enter the giveaway, just leave a comment on this post and on every blog in the hop. We will choose random winners from the comments and post them on the Pink & Main blog on the 15th of February.

Your next stop on the hop is the very talented

Here is the complete lineup in case you get lost somewhere along the way:

Thanks so much for stopping by my blog today!
I really appreciate it!
Happy hopping and I hope you have a great crafty day!!

 photo signaturecopy_zpsa1897fa6.png
Supply List:
--Cardstock: Daffodil Delight (SU!), White (Georgia Pacific & Copic)
--Ink: Memento Tuxedo Black
--Copics: BG10, BG11, C0, C2, C3, C4, C6, G24, R21, Y08, Y11
--Misc.: Ribbon, Velcro, Corner Chomper, File Folder, Paper Clip, White Gel Pen, Foam Tape, Glossy Accents.
Thursday, February 9, 2017

If You Give A Crafter A Cookie #62

Happy Thursday!!
Today starts a new challenge over at
If You Give A Crafter A Cookie

We have two sponsors for this challenge. They are:

Elisabeth Bell
and
The Cutting Cafe

Here is a look at the Cookie Inspiration Photo for this challenge:

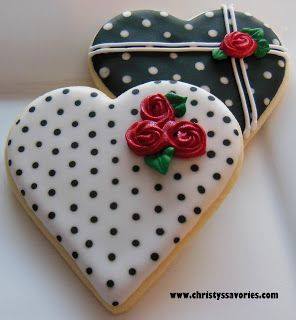
So pretty! I love those polka dots!!

Here is the card I created based on the above cookie photo:


I used a file from one of our sponsors, The Cutting Cafe, called "I Heart U Word Shaped Card".
 I love the polka dots on the cookies in the photo so I went with some polka dot paper for my heart on my card. I added some fun shaker bits of small hearts, micro beads, confetti and small sequins to the center.


I stamped my greeting and curled it a little with my bone folder to give it a little dimension. I added a heart button with a crochet thread bow to the middle. The file even came with an envelope. I cut that out and then adhered the polka dot heart that was cut from the center of my card to the bottom front corner. I finished off my card and envelope with some fun white doodle with my gel pen. This card is going to my hubby for Valentine's day. I hope he likes it :)


Be sure to stop by the 
to see all the fabulous creations my Design Team sisters created.
If you are inspired by the cookie photo, I hope you will create a project and link up :) 
I would love to see what you create!

I will also be entering this card into the challenge over at

Thanks so much for stopping by today!
I really appreciate it!
❤ I hope you have a great crafty day! ❤

 photo signaturecopy_zpsa1897fa6.png
Supply List:
--Cardstock: White (Colorbok), Red 9AC)
--Patterned Paper: DIY Boutique (Simple Stories)
--Stamp: With All My Heart 9Scrappy Moms Stamps)
--Ink: Memento Tuxedo Black
--Misc.: Sequins, Button, Acetate, Crochet Thread
Related Posts Plugin for WordPress, Blogger...

Would You Like Posts Delivered To Your Email?

Get new posts by email:

I Proudly Design For...

Jaded Blossom

Follow this blog with Bloglovin'

Follow on Bloglovin Follow on Bloglovin

Search This Blog

Blog Archive

My Blog List

Challenge Blogs I Love

Labels

2 Cute Ink (4) 3 Birds On Parade (1) 365 Cards (5) 3D Items (374) A Child's Year (5) AAA Birthday (4) Accent Essentials (5) Action Wobbles (18) Addicted To Stamps & More (14) All Dressed Up Stamps (18) All Mixed Up (3) All Occasion Cake Art (3) Altered Item (60) An Inky Situation (3) Anniversary/Wedding (10) Announcement (3) Artiste (13) Autumn (58) Avery Elle (9) Baby (23) Baby Steps (4) Banner (5) Best Wishes (5) Big Picture Classes (1) Birthday (251) Birthday Bash (9) Birthday Sundaes (9) Bits & Pieces (1) Bitten By The Bug2 (36) Blog Hops (57) Bloom (2) Box (4) Boys Will Be Boys (3) Breast Cancer Awareness (4) Bugaboo Stamps (1) C.C. Designs (13) Camp Create (21) CANDi (22) Candy (293) Car Decals (2) Card Folds (22) Card Harmony (10) Carousel (1) Cartridge Toss-Up (7) Celebrate With Flourish (3) Celebrations (5) Center Step Card (10) Christmas (239) Christmas Card Challenges (14) Christmas Cheer (7) Clean and Simple (114) Clearly Besotted (4) Colored Pencils (1) Congrats (21) Cooking With Cricut (34) Copic (7) Copics (640) CPS (18) Craft It Up & Link It Up! (8) Craftwork Cards (22) Crafty Creations (1) CreateACritter (27) CreateACritter2 (4) CreateAFriend (1) Cri-Kits (2) Cricut (404) Cricut 360 (13) Cricut Alphabet (5) Cricut Cardz Challenge (4) Cricut Essentials (1) Criss Cross Card (2) CTMH (21) Cupcake Inspirations (6) Cut Club (9) Cut It Up Challenges (23) Cuttlebug (144) Darcie's (3) DCWV (26) Design Team (2) Designer's Calendar (1) Di's Digital Stamps (12) Diamond Fold Card (1) Die Cuttin Divas (12) Dies R Us (12) Digi Doodle Studios (32) Digi Doodles (1) Digital Stamps (57) Don Juan (1) Doodlebug (72) DoodleCharms (15) Doodletype (1) Dr.PhilScraps (22) Easel Card (8) Easter (63) Elegant Edges (16) Embossing (2) Encouragement (89) Everyday Pop-Up Cards (4) Fall (38) Fantabulous Cricut Challenge Blog (8) Father's Day (8) First Friday Challenge (1) First Responders (1) Flaunt It Fridays (5) Flower Shoppe (4) Foil (2) For You (3) Forever Young (6) Four Legged Friends (1) Fourth of July (16) Frantic Stamper (1) Frappachino Jars (5) French Manor (1) Freshly Made Sketches (1) Friendship (88) From My Kitchen (1) Galentine (1) Gate Fold (3) George and Basic Shapes (14) Gerda Steiner (22) Get Well (25) Gift Bag (63) Gift Card (38) Gnomes (10) Graduation (13) Graphically Speaking (3) Guest Designer (24) Gypsy (13) Gypsy Wanderings (3) Halloween (146) Hannah Montana (2) Happy Hauntings (4) Harry Potter (3) Heffy Doodle (1) Hello (257) Hello Bluebird (10) Hello Kitty Greetings (6) Holiday Card Workshop (5) Home Decor (14) Honey Bee Stamps (3) Hoot 'N' Holler (1) If You Give A Crafter A Cookie (11) Independence Day (2) Indie Art (1) Ink Blending (4) Ink N Splatter (30) Inking It Up Crazy (4) Inspiration Wednesday (4) Interactive (6) Invitation (1) Jaded Blossom (448) Jitterbuggin' (1) Journaling Spots (1) Joy's Life Stamps (122) Jubilee (2) Just Because Cards (9) Just For Fun (60) KaDoodle Bug (56) Kat Scrappiness (1) Kate's ABC's (1) Krafty Girls (17) La-La Land Crafts (14) Lacy Labels (12) Lawn Fawn (90) Lawn Fawnatics (14) Layout (29) Let's Capture These Sketches (1) Life's A Beach (5) Life's A Party (7) Live Simply (1) Locker Talk (4) Love (134) Love My Tapes (10) Love You A Latte (2) LoveBug Creations (51) Lovely Floral (2) Lyrical Letters (9) M.A.G. Challenge (1) Made In Minutes (4) Mama Elephant (14) Masculine (36) MCT Challenge (5) Memory Box (1) MemoryDex (6) Meow (1) Mer-May (9) MFT Sketch Challenge (17) Minc (3) Mini Album (5) Mini Monsters (6) Miss Kate's Cuttables (3) Miss You (1) Mo's Digital Pencil (1) Mojo Monday (35) Mother's Day (15) MPS Challenge (8) My Craft Space (1) My Creative Time (337) My Favorite Things (175) My Scrap Chick (8) Neat & Tangled (1) New Arrival (4) New Year (1) Nifty Fifties (3) Note Card (92) Nursery Rhymes (1) Once Upon A Princess (1) Online Card Class (16) Pack Your Bags (3) Paisley (2) Paper Doll Dress Up (10) Paper Nest Dolls (7) Paper Play Sketches (11) Paper Playtime (15) Paper Sweeties (2) Paper Therapy (24) Paperie Ink (1) Party Favors (3) Patriotic (6) Pause Dream Enjoy (22) PDE Linky Party (23) Peachy Keen Stamps (58) Penny Black (4) Perfect Sentiments (1) Photo Inspiration (1) Pink & Main (145) Pink & Main Challenge (11) Pink Gem Designs (17) Pinterest Inspired (1) Plantin Schoolbook (9) Pooh and Friends (2) Pooh Font (3) Pretty Cute Stamps (2) Pretty Paper Pretty Ribbons (2) Print & Cut (1) Project Life (7) Punch Board (7) Puns (41) RAM stamps (1) Rock Princess (6) S Fold (2) Scan N Cut (14) Scenes (1) Scrapbook.com (5) Scrapping The Little Things (7) Scrappy Moms (61) Scrappy Moms Release (21) Seize The Birthday (15) Sentimentals (5) Shabby Chic (1) Shaker Card (32) Shaped Cards (46) Shopping Our Stash (36) Silhouette (146) Silhouette Challenges (5) Simon Says Stamp (5) Simon Says Stamp Monday Challenge (7) Simon Says Wednesday Challenge (37) Simply Charmed (9) Simply Sweet (1) sketch (4) Sketch N Scrap (27) Sketches:Creatively Yours (6) Slimline (19) Smiley Cards (3) Sophisticated (2) Sorry (1) Spellbinders (15) Splitcoast Stampers (1) Spongebob Squarepants (1) Sports Mania (2) Spring (26) Spring Cottage (2) Spring Holiday Cards (1) SSS Wednesday Challenge (2) St. Patrick's Day (14) Stamp Anniething (86) Stamp/Die of the Month (2) Stampin' Up! (43) Stamping Bella (10) Stand and Salute (6) StarJamLines (1) Stencils (4) Stick It Down (7) Storybook (12) Straight from the Nest (8) Stretch Your Dies (5) Summer (59) Summer Celebrations (1) Sunny Day Crafting (6) Sunny Studio (5) SVG Attic (1) SVGCuts (15) SVGCuttingFiles (55) Swaps (5) Sweet November (1) Sweet Shop (1) Sweet Tooth Boxes (2) Sweet Treats (10) Sweethearts (8) Sympathy (3) Tacky Tuesday (6) Tags (28) Tags Bags Boxes and More (6) Tags Bags Boxes and More 2 (6) Taylored Expressions (3) Teacher Appreciation (1) Tear Drop (2) Teddy Bear Parade (7) Tent Topper (5) Terrific Tuesday Challenges (10) Thank You (73) Thanksgiving (25) The First Few Years (1) The Four Seasons Challenge (4) The Greeting Farm (13) The Paper Shelter (2) The Paper Variety (3) The Perfect Sentiment (11) The Rabbit Hole Designs (1) The Sweet Shop (1) The Sweet Stop (9) Thinking of You (95) Thrifty Thursday (5) Throwback Thursday (5) Tiddly Inks (2) Tie The Knot (2) Too Cute By Jessica (1) Trendy Twine (38) Trinity Stamps (3) Try Me Tuesday (4) Try Stampin On Tuesday (8) Tuesday Morning Sketches (5) Tutorial (1) Twinkle Toes (3) Unity Stamp Co. (5) Use It Tuesday (13) Valentine's Day (97) Valentine's Sentiments (1) Varsity Letter (1) Victorian Romance (1) Vinyl Projects (2) Wacky Wednesday (1) Waffle Flower (2) Washi (6) Watercolor (16) Welcome Home (1) What A Treat Wednesday (1) Whatever Wednesday (2) Whimsy Stamps (1) Wild Card (31) Winter (31) Winter Frolic (3) Winter Woodland (4) Wrap It Up (5) Your Next Stamp (5) Zig Clean Color (6)

Honorable Gnome

I was Spotted!

Camp Create 2016

Total Pageviews

>

Info

Occasionally I will be posting projects that use products that I have been given as a Design Team Member for a certain team. I will never endorse anything that I do not strongly believe in.

Copyright Info:

Please note that all of my work is original unless otherwise stated. It is for your own personal enjoyment only. Please do not copy for profit, publication, design contest or teams, or pass off as your own. Thank you and Enjoy!